How to Convert Any Design to VIP Embroidery Format Without Losing Quality
Introduction
You have spent hours perfecting a design, carefully selecting colors and adjusting every detail, only to discover your Husqvarna Viking or Pfaff machine cannot read the file. It is a moment of pure frustration that can derail your entire embroidery project. The solution lies in understanding how to convert your artwork into a format your machine actually understands, and that is exactly what we will cover today.
The VIP embroidery format is the native language for many Husqvarna Viking and Pfaff machines, but getting your designs into this format without compromising quality requires more than just clicking a button. Whether you are working with a simple logo or an intricate pattern, mastering the conversion process unlocks a world of creative possibilities. Let us walk through everything you need to know how to convert files to VIP embroidery format successfully, preserving every stitch and detail along the way.
Understanding the VIP Format and Why It Matters
Before we jump into the conversion process, let us talk about what a VIP file actually contains. Unlike a standard image file, a VIP file is packed with detailed stitch data that directs your embroidery machine exactly how to sew your design . This includes information about stitch placement, direction, density, underlay, and even color changes .
The VIP format emerged after a merger between Husqvarna Viking and Pfaff in the late 1990s, becoming the go-to format for these machines . Today, these files contain vector-based needle coordinates that automate the stitching process . When you convert a design to VIP, you are essentially translating your artwork into a language your machine can read and execute perfectly.
One key limitation to understand is the proprietary nature of VIP files. They are specifically designed for Husqvarna Viking and Pfaff machines and might not work correctly on Brother, Janome, or other brands without additional conversion . This is why getting the conversion right the first time is so important.
The Truth About Converting Image Files
Here is something many embroiderers learn the hard way: you cannot just upload a JPG or PNG to your embroidery machine and expect it to work . Image files describe pixels, colors, and shapes, but they contain absolutely zero information about where stitches should go or how the machine should move.
Converting an image to a VIP embroidery file is not really a conversion at all, but a process called digitizing. During digitization, a skilled operator or specialized software actually recreates your design using stitches . They determine the stitch type for each area, the direction of those stitches, the density, and the sequence they should follow .
This fundamental distinction explains why online converters that claim to magically turn images into embroidery files often produce disappointing results. Real VIP file creation requires understanding embroidery principles and making decisions about how the design should stitch out.
Choosing Your Conversion Method
When it comes to creating VIP files, you have several options, each with its own strengths and considerations.
Software specifically designed for Husqvarna Viking machines, like Premier+ 2 and mySewnet, offers the most seamless experience for creating VIP files. These programs understand the machine specifications intimately and produce files that work perfectly with your equipment .
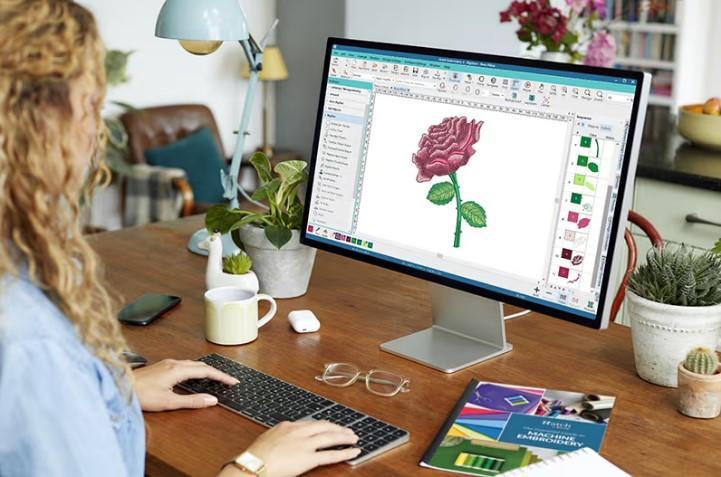
Professional digitizing software like Wilcom Embroidery Studio, Hatch, or Pulse gives you incredible control over the digitizing process . These industry-standard tools allow you to fine-tune every aspect of your design, from stitch angles to density adjustments. The learning curve can be steep, but the results are often worth the investment.
For those just starting out or working with a limited budget, programs like StitchBuddy or Stitch Viewer Pro offer accessible entry points . These tools support VIP export and can handle many common embroidery file formats. The free versions typically come with some limitations, but they provide an excellent way to understand the conversion process before investing in more advanced software.
The Step-by-Step VIP Conversion Process
Let us walk through the actual process of creating a VIP file from your artwork.
First, import your design into your digitizing software. High-resolution images with clear edges and good contrast produce the best results. If possible, vector artwork often digitizes more cleanly than raster images .
Next, trace the outlines of your design using the software tools. This process converts the visual shapes into paths that the machine will follow. Proper pathing is crucial because it determines how stitches flow across the design and helps avoid unnecessary jumps or trims .
Now comes the creative part: choosing the right stitch types for different elements. Satin stitches work beautifully for text and borders, while fill stitches cover larger areas evenly. Running stitches handle fine details and outlines. Choosing appropriate stitch types for each part of your design ensures professional-looking results .
Adjusting the settings is where professional-quality conversions happen. Stitch density controls how tightly stitches pack together, underlay stitches provide a stable foundation for the design, and pull compensation corrects for fabric stretch and distortion . These adjustments might seem minor, but they make the difference between a design that looks amazing and one that disappoints.
Finally, export your design in the VIP format. Most digitizing software includes VIP as an export option, especially if it supports Husqvarna Viking machines . Some programs might refer to VIP as VP3, which is a related format used by newer Husqvarna Viking machines .
Common Mistakes That Kill Quality
Even experienced embroiderers make mistakes when converting to VIP, but knowing what to watch for can save you from disappointment.
One frequent error is overlooking the hoop size. Converting a design that exceeds your hoop capacity will leave you with an incomplete embroidery. Always check your hoop dimensions before starting the conversion process.
Another common mistake involves stitch density. Different machines and fabrics handle density differently, and what works for one might cause thread breaks or fabric puckering on another. Testing on scrap fabric before committing to your final piece is always a smart move.
Color mapping can also trip you up. Not all software handles color information the same way, and converting between formats might shift your carefully chosen palette. Double-check your color assignments before finalizing the VIP file .
Manual Versus Auto Digitizing
Many digitizing programs include auto-digitizing features that promise to convert your artwork with a single click. While this approach can work for simple, vector-based designs with clean edges and few colors, it often produces inconsistent results with complex artwork .
Manual digitizing, on the other hand, gives you full control over every aspect of the design. You determine stitch directions, densities, and types for each element. This approach takes more time and skill, but it is the only way to ensure professional-quality results, especially for logos and detailed designs .
The best approach often combines both methods. Auto-digitizing can provide a starting point, and manual refinement handles the fine-tuning that makes a design truly shine.
Testing Your VIP File Before Stitching
Testing is non-negotiable in embroidery, yet it is surprising how many people skip this crucial step. Before stitching your VIP file on your final fabric, run a test on similar material .
This test reveals potential issues with density, pull compensation, and underlay that might not be apparent in the software preview. It also confirms that your color choices work well with the fabric. Pay attention to how the stitches settle and whether any puckering or gaps appear.
Many digitizing programs include simulation features that let you preview the stitching sequence on screen. While not a substitute for actual testing, these simulations help catch obvious errors in stitch order or color sequencing before wasting thread and fabric .
Professional Help When You Need It
There is no shame in seeking professional digitizing services when the situation demands it. Complex designs, tight deadlines, or simply the desire for guaranteed quality might make professional help the smart choice.
Professional digitizers understand the nuances of VIP file creation and can produce designs that stitch perfectly every time . They handle the tricky aspects like pull compensation, underlay selection, and stitch optimization so you can focus on your embroidery rather than wrestling with software.
Many professional services offer free revisions and quick turnaround times, making them a practical option even for smaller projects .
Conclusion
Creating VIP embroidery files that maintain quality and stitch perfectly is entirely achievable with the right approach. Understanding that VIP format is a stitch-ready language rather than just another image file is the foundation of successful conversion.
Whether you choose dedicated Husqvarna Viking software, professional digitizing tools, or professional services, the key is respecting the craft. Testing your designs, paying attention to details like density and underlay, and learning from each project builds your skills over time.
The next time you sit down at your embroidery machine, you will have the confidence that comes from knowing your VIP file contains everything your machine needs to bring your creative vision to life. No more compatibility headaches, no more wasted materials, just beautiful embroidery that you created from start to finish.

 Arabic
 French
 Spanish
 Portuguese
 Deutsch
 Turkish
 Dutch
Dutch
 Italiano
 Russian
 Romaian
 Portuguese (Brazil)
 Greek
Greek