


10 Decoupage Furniture Ideas to Refresh Old Pieces
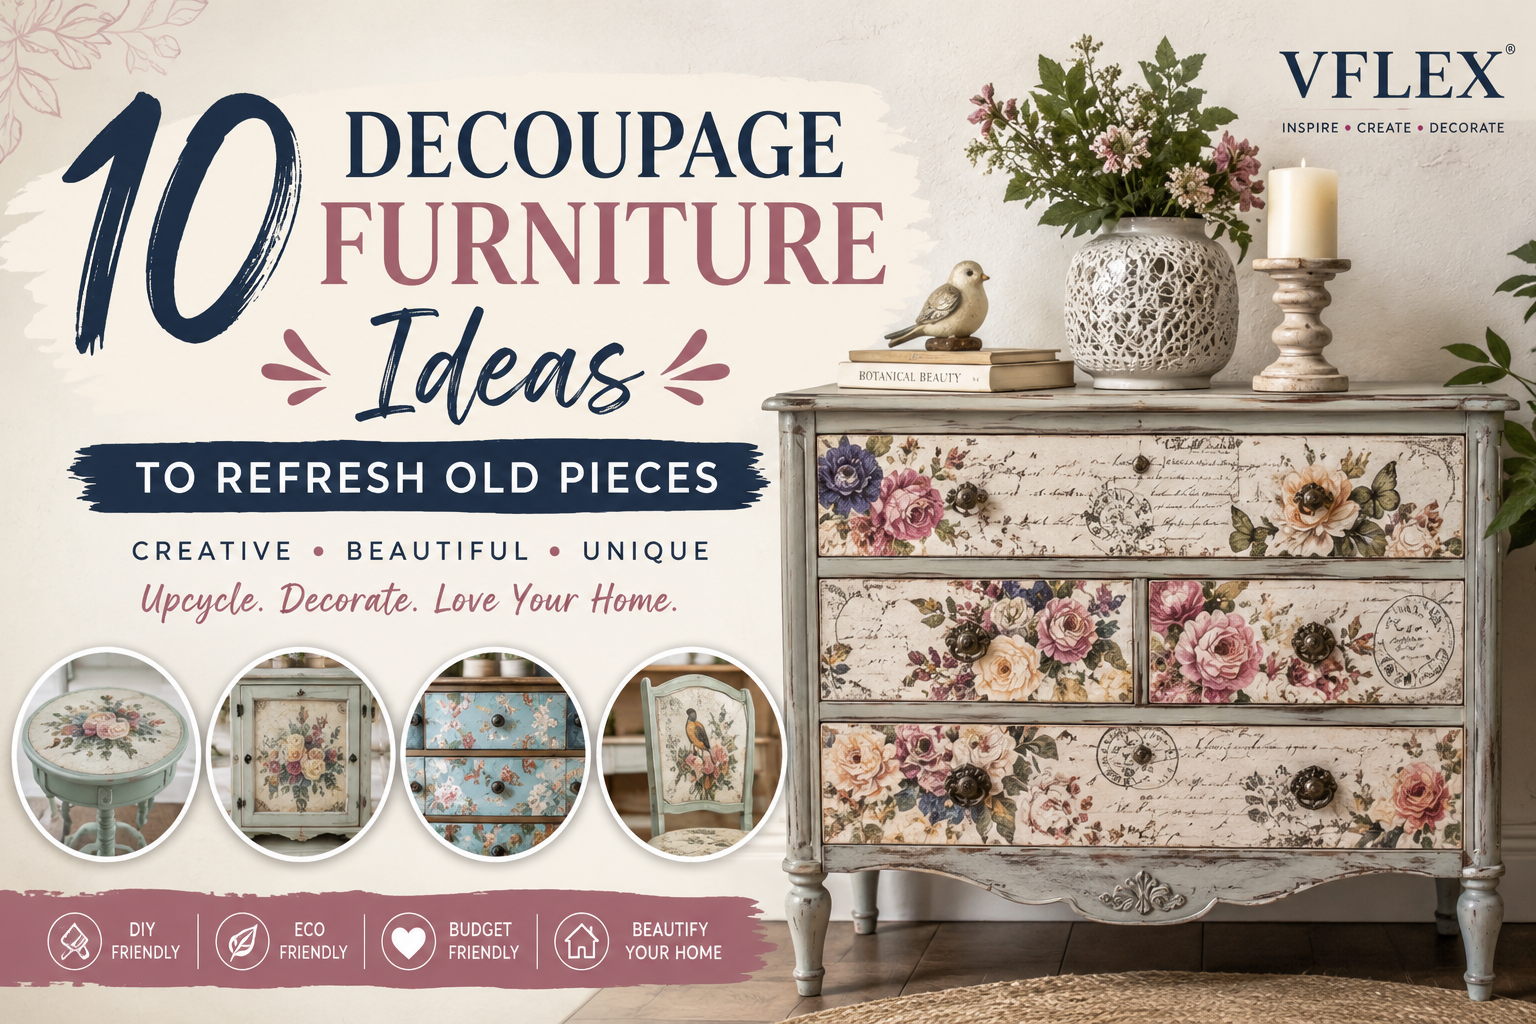
An outdated dresser, tired cabinet, or forgotten side table does not necessarily need to be replaced. With thoughtful preparation and the right decorative techniques, old furniture can become a distinctive piece of home décor.
Decoupage furniture ideas are particularly effective because they allow you to introduce artwork, color, pattern, and texture without having to hand-paint every detail. Decorative rice paper can be used as a focal point, a subtle accent, or part of a layered mixed-media design.
For furniture artists and DIY decorators, decoupage also offers considerable creative freedom. A single piece can combine painted finishes, rice paper, transfers, appliques, distressing, and protective coatings to create a result that feels personal and intentional.
Whether you are working on your first DIY furniture makeover or regularly upcycle furniture for clients, these 10 ideas can help you approach your next project with a more considered design strategy.
Why Decoupage Works So Well for Furniture
Furniture has large, structured surfaces that naturally lend themselves to decorative artwork. Drawer fronts, cabinet panels, tabletops, and chair backs can all become focal areas without changing the original construction of the piece.
Decoupage is also versatile from a design perspective. Botanical imagery can create a relaxed, nature-inspired look, while vintage portraits, florals, landscapes, and whimsical illustrations can produce very different moods.
Rice paper is especially useful for furniture projects because its lightweight construction allows designs to be layered and blended into a prepared background. The finished effect can look more integrated than simply placing a thick decorative image on top of painted furniture.
The key is not to decorate every available surface. Professional-looking furniture usually has a clear visual hierarchy, with some areas drawing attention and others allowing the eye to rest.
1. Create a Statement Dresser
A dresser provides several opportunities for creative composition. The drawer fronts can become the primary focal point while the frame remains relatively understated.
For a botanical or artistic design, consider using dragonfly crafts rice paper on one or more drawer fronts. Look at the colors within the artwork before selecting your furniture paint. Pulling a secondary color from the paper and repeating it on the frame can make the finished piece feel cohesive.
Before applying the paper, lay the design across the drawers and photograph the arrangement. This is particularly important when an image extends across multiple drawers because small changes in placement can affect the overall composition.
Professional tip: Let the artwork determine the paint palette rather than choosing the paint first. This generally produces a more unified result.
2. Give an Old Cabinet a Vintage Character
Cabinet doors with recessed panels are naturally suited to decoupage because the panel creates a visual frame for the artwork.
For an elegant, vintage, or slightly dramatic furniture style, the queen of hearts rice paper collection offers decorative imagery that can work particularly well on cabinet panels and statement furniture.
You do not have to cover the entire cabinet. Applying paper only inside the recessed sections can create contrast while allowing the structure of the original furniture to remain visible.
If the cabinet already has ornate details, keep the surrounding paint finish relatively simple. Too many competing patterns can make an otherwise beautiful piece appear visually crowded.
3. Refresh a Bedside Table
A bedside table is an excellent project for beginners because it offers a manageable surface without requiring the commitment of a large dresser or cabinet.
You can decorate the tabletop, drawer front, or both. For a subtle makeover, use a decorative design only on the drawer and coordinate the paint with one of the colors in the paper.
When working with printed rice paper, planning is particularly important. Place the design on the furniture before adding adhesive so you can determine exactly where the focal image will sit.
If you are new to furniture decoupage, a small project like this also gives you an opportunity to practice smoothing, layering, trimming, and sealing techniques before moving on to a larger piece.
4. Turn a Plain Table Into a Focal Point
A side table or occasional table can become a statement piece without requiring a complicated design.
One effective approach is to create a central artwork area on the tabletop and surround it with a painted border. This preserves some of the furniture's original visual structure while giving the surface a new identity.
When selecting decoupage paper for furniture, always consider scale. A design that looks balanced on a small tray may appear too repetitive or insignificant across a large tabletop.
The intended use of the table also matters. A decorative accent table has different finishing requirements from a surface that will regularly hold drinks, books, or other objects.
Choose a protective finish that is compatible with the products used and follow the manufacturer's drying and curing recommendations.
5. Add Decoupage to a Chair Back
A complete furniture makeover is not always necessary.
A wooden chair with a solid back panel can become an eye-catching accent piece when decorative paper is added only to the central section.
This technique works particularly well in dining rooms, bedrooms, craft rooms, and reading areas where you want to introduce artwork without overwhelming the rest of the décor.
You can use the same design on a set of chairs for a coordinated look or combine complementary designs for a more collected, eclectic appearance.
The surrounding paint color should support the paper rather than compete with it. When the artwork is detailed, a simpler frame often produces the most polished result.
6. Create a Romantic Vanity Makeover
Vanities offer multiple decorative opportunities because they often include drawers, framed panels, curved edges, and architectural details.
Floral, botanical, vintage, and fantasy-inspired imagery can work particularly well on vanity drawer fronts. You can create a cohesive palette by painting the body of the vanity in a color pulled from the artwork.
For an experienced furniture artist, this is also an opportunity to introduce several techniques without making the piece feel overworked. A small amount of distressing around the edges, subtle decorative detailing, or carefully selected hardware can complement the decoupage.
The important principle is balance. If the rice paper already provides a strong focal point, additional decorative techniques should support the design rather than compete with it.
7. Decorate Furniture Drawers With Rice Paper
One of the easiest ways to introduce rice paper for furniture is to focus on the drawers rather than the entire piece.
This approach is particularly useful when you want to preserve some of the original furniture character. A plain chest of drawers, for example, can retain its painted frame while the drawer fronts receive coordinated artwork.
For designs that continue across several drawers, take time to align the imagery before applying adhesive. Look at the piece from several feet away as well as close up. What looks perfectly positioned on a worktable can appear different once the furniture is standing in its intended location.
You can also use different sections of one design to create individual drawer compositions while maintaining a common color palette.
8. Combine Decoupage With Furniture Transfers
Decoupage does not have to be the only decorative technique on a furniture piece.
Combining rice paper with furniture transfers can create depth and give an upcycled piece a more artistic, layered appearance. Use the paper to establish the primary background and introduce a transfer as a secondary focal element.
The trick is to establish hierarchy before you begin. Decide which element should immediately attract attention and which elements should provide supporting detail.
For example, a large botanical paper design might serve as the primary focal point, while a small transfer could add lettering or additional botanical details.
This mixed-media approach is especially useful for furniture artists who want their finished pieces to have a handcrafted, collected appearance rather than looking like a single technique was applied uniformly.
9. Add Dimension With Appliques and Onlays
Decoupage creates visual detail, but appliques and onlays can add physical dimension to the furniture itself.
For example, you could use decorative paper inside a cabinet panel and place an ornamental accent above the panel or around its frame. This creates a relationship between the flat artwork and the raised decorative element.
VFLEX Appliques & Onlays includes decorative furniture accents that can be used on areas such as dressers, cabinets, mirrors, and other furniture pieces.
For a subtle finish, paint the applique in a similar tone to the furniture. For more contrast, use a complementary or metallic finish to make the raised detail stand out.
Professional tip: Choose one or two areas for dimensional embellishment rather than adding an applique to every available surface.
10. Create a Designer-Inspired Upcycled Furniture Piece
For experienced DIY decorators and furniture artists, decoupage can become one part of a larger design rather than the entire makeover.
Start with a piece that has interesting proportions, useful storage, or architectural details worth preserving. Repair structural problems and prepare the surface before beginning the decorative stage.
You can then build the finish gradually using:
- Decorative rice paper
- Furniture paint
- Transfers
- Appliques and onlays
- Stencils
- Metallic accents
- Distressing
- Decorative hardware
- Protective topcoats
For a more artistic or atmospheric furniture design, the forevermore decoupage collection offers fantasy-inspired and expressive imagery that can become the starting point for a statement piece.
The objective is not simply to make old furniture look new. The strongest upcycled furniture projects preserve the character of the original piece while giving it a completely new visual purpose.
How to Prepare Furniture Before Decoupage
Good preparation is one of the biggest differences between a quick craft project and a durable furniture makeover.
Begin by cleaning the furniture thoroughly. Dirt, grease, wax, and residue can interfere with adhesion. Inspect the surface for loose paint, damaged veneer, cracks, chips, or structural problems and address these issues before decorating.
Depending on the existing finish, the piece may require sanding or priming. The objective is to create a clean, stable surface that is appropriate for the products you plan to use.
Once the furniture is prepared, establish your base paint color and allow it to dry according to the paint manufacturer's instructions.
Do not rush directly into applying the paper. Take time to plan the composition first.
How to Plan a Professional-Looking Decoupage Design
Before applying adhesive, place your paper on the furniture and consider:
- Where the main focal point will sit
- How the artwork interacts with drawers and doors
- Whether the design needs to continue across multiple sections
- Which paint color complements the artwork
- Where hardware will be positioned
- Whether transfers or dimensional elements are actually needed
A useful professional habit is to photograph the furniture before applying anything permanently. Review the image rather than relying only on what you see while standing close to the work surface.
This can reveal whether one area is too busy or whether the focal point needs to be repositioned.
Choosing the Right Paper for Furniture
The best decoupage paper for furniture is not simply the prettiest design. It should work with the furniture's proportions, style, color palette, and intended location.
Large floral or scenic designs can work well on broad dresser fronts and cabinet doors. Smaller patterns may be more appropriate for drawers, chair panels, and compact tables.
If you prefer artistic and playful imagery, Whimsykel designs can also provide inspiration for furniture and décor projects. VFLEX's existing content describes Whimsykel decoupage paper as suitable for cutting, tearing, and blending techniques, making it an interesting option for more creative compositions.
The most important consideration is the relationship between the paper and the furniture. The design should enhance the shape of the piece rather than hide it completely.
Common Decoupage Furniture Mistakes to Avoid
Even an attractive paper design can produce disappointing results if the application process is rushed.
Applying paper to an inadequately prepared surface: Dirt, grease, loose coatings, or damaged surfaces can affect adhesion.
Ignoring scale: Artwork that is too small can look lost on a large dresser, while an oversized design may not suit a narrow drawer.
Using too many decorative techniques: Paint, paper, transfers, metallic effects, and appliques can work together, but each should have a purpose.
Rushing the drying process: Give adhesives, paint, and protective finishes sufficient time to dry and cure according to their product instructions.
Skipping the design plan: Once adhesive is applied, repositioning decorative paper can become difficult. Planning first saves time and reduces avoidable mistakes.
How to Protect Decoupage Furniture
A beautiful furniture makeover needs an appropriate protective finish.
The type of furniture and how it will be used should influence your finishing approach. A decorative cabinet may experience little handling, while a tabletop or bedside table may be exposed to considerably more everyday wear.
Use a compatible protective product and follow its manufacturer's instructions carefully. Apply even coats rather than trying to achieve maximum protection with one heavy layer.
Allow the finished furniture to cure adequately before putting it into regular use. Dry to the touch does not always mean fully cured.
Why Furniture Upcycling Is More Than a Trend
Furniture upcycling gives homeowners and furniture artists an alternative to simply replacing pieces that no longer fit their style.
An outdated dresser can become a statement bedroom piece. A plain cabinet can become a focal point in a living room. A small table can become a personalized accent that would be difficult to replicate with mass-produced furniture.
Decoupage adds another layer of creative freedom because the artwork can be changed according to the room, season, design style, or individual taste.
That combination of reuse and personalization is what makes DIY furniture makeover projects so appealing to creative homeowners.
Final Thoughts
The best decoupage furniture ideas combine creativity with careful preparation. The decorative paper may be the feature that catches your attention first, but professional-looking results depend on the entire process—from choosing the right furniture and planning the composition to preparing the surface and protecting the finished piece.
You can keep your project simple by decorating a single drawer or chair panel, or take a more ambitious approach by combining rice paper with paint, transfers, appliques, and other mixed-media techniques.
At VFLEX, you can find decorative papers and creative furniture-upcycling supplies suited to a wide range of styles and projects. Whether you are refreshing one piece for your home or creating furniture as an artist, the right materials can give you more freedom to develop a design that feels genuinely your own.
Ready to give an old piece a new identity? Start with furniture that has good bones, plan your design carefully, and let the artwork guide the makeover.
Frequently Asked Questions
What furniture is best for decoupage?
Dressers, cabinets, bedside tables, vanities, side tables, and furniture with flat or recessed panels are good choices. Beginners may want to start with a smaller piece because it is easier to manage during paper application and finishing.
Can you use rice paper for furniture decoupage?
Yes. Rice paper is commonly used for decorative furniture projects because it is lightweight and flexible. It can be applied to areas such as drawer fronts, cabinet doors, tabletops, and other appropriately prepared surfaces.
Do you need to paint furniture before decoupaging?
Not necessarily. However, a properly prepared and appropriately colored background can help the artwork blend into the furniture and influence the final appearance. Always prepare the surface according to its existing finish and the products being used.
How do you prevent wrinkles when applying rice paper?
Apply adhesive evenly and work in manageable sections. Position the paper carefully and smooth it gently from the center outward. Avoid repeatedly lifting and repositioning the paper once it begins adhering.
Can you decoupage an entire dresser?
Yes. However, covering every surface is not always necessary. Using decoupage on drawer fronts, side panels, or a central area can create a stronger focal point while allowing the furniture's shape and painted finish to remain visible.
Can decoupage and furniture transfers be used together?
Yes. Combining the two techniques can create a layered mixed-media finish. Plan the artwork and transfer placement before application so the different elements have a clear visual hierarchy.
How do you make decoupage furniture look professional?
Focus on surface preparation, artwork scale, composition, color coordination, clean application, and proper protection. Avoid adding decorative techniques simply because there is available space. Intentional design generally creates a more sophisticated result.
How do you choose the right decoupage paper for furniture?
Consider the size and shape of the furniture, the room where it will be used, the existing color palette, and the design style you want to achieve. Large pieces often benefit from artwork with an appropriate visual scale, while smaller furniture can accommodate more detailed patterns.
How long does a decoupage furniture makeover take?
There is no single timeframe. It depends on the furniture's condition, preparation requirements, number of paint and decorative layers, adhesive drying time, and protective finish. A small table may take considerably less time than a large dresser or cabinet.
Is decoupage furniture durable?
It can be durable when the surface is properly prepared, compatible products are used, and the finished piece receives an appropriate protective coating. Furniture that receives heavy daily use may require more careful consideration of the final finish than purely decorative pieces.

 English
 Arabic
 French
 Portuguese
 Deutsch
 Turkish
 Dutch
Dutch
 Italiano
 Russian
 Romaian
 Portuguese (Brazil)
 Greek
Greek